Campaigns is our feature for sending bulk messages without limits. Although it is very similar to Bulk Messages, it is not exactly the same. This article will guide you through the process of sending a campaign and what you can do after sending it.
Below you can see the topics we will cover:
- Campaigns Screen
- Creating Campaigns
- Campaign Details
- Credits
Campaigns Screen
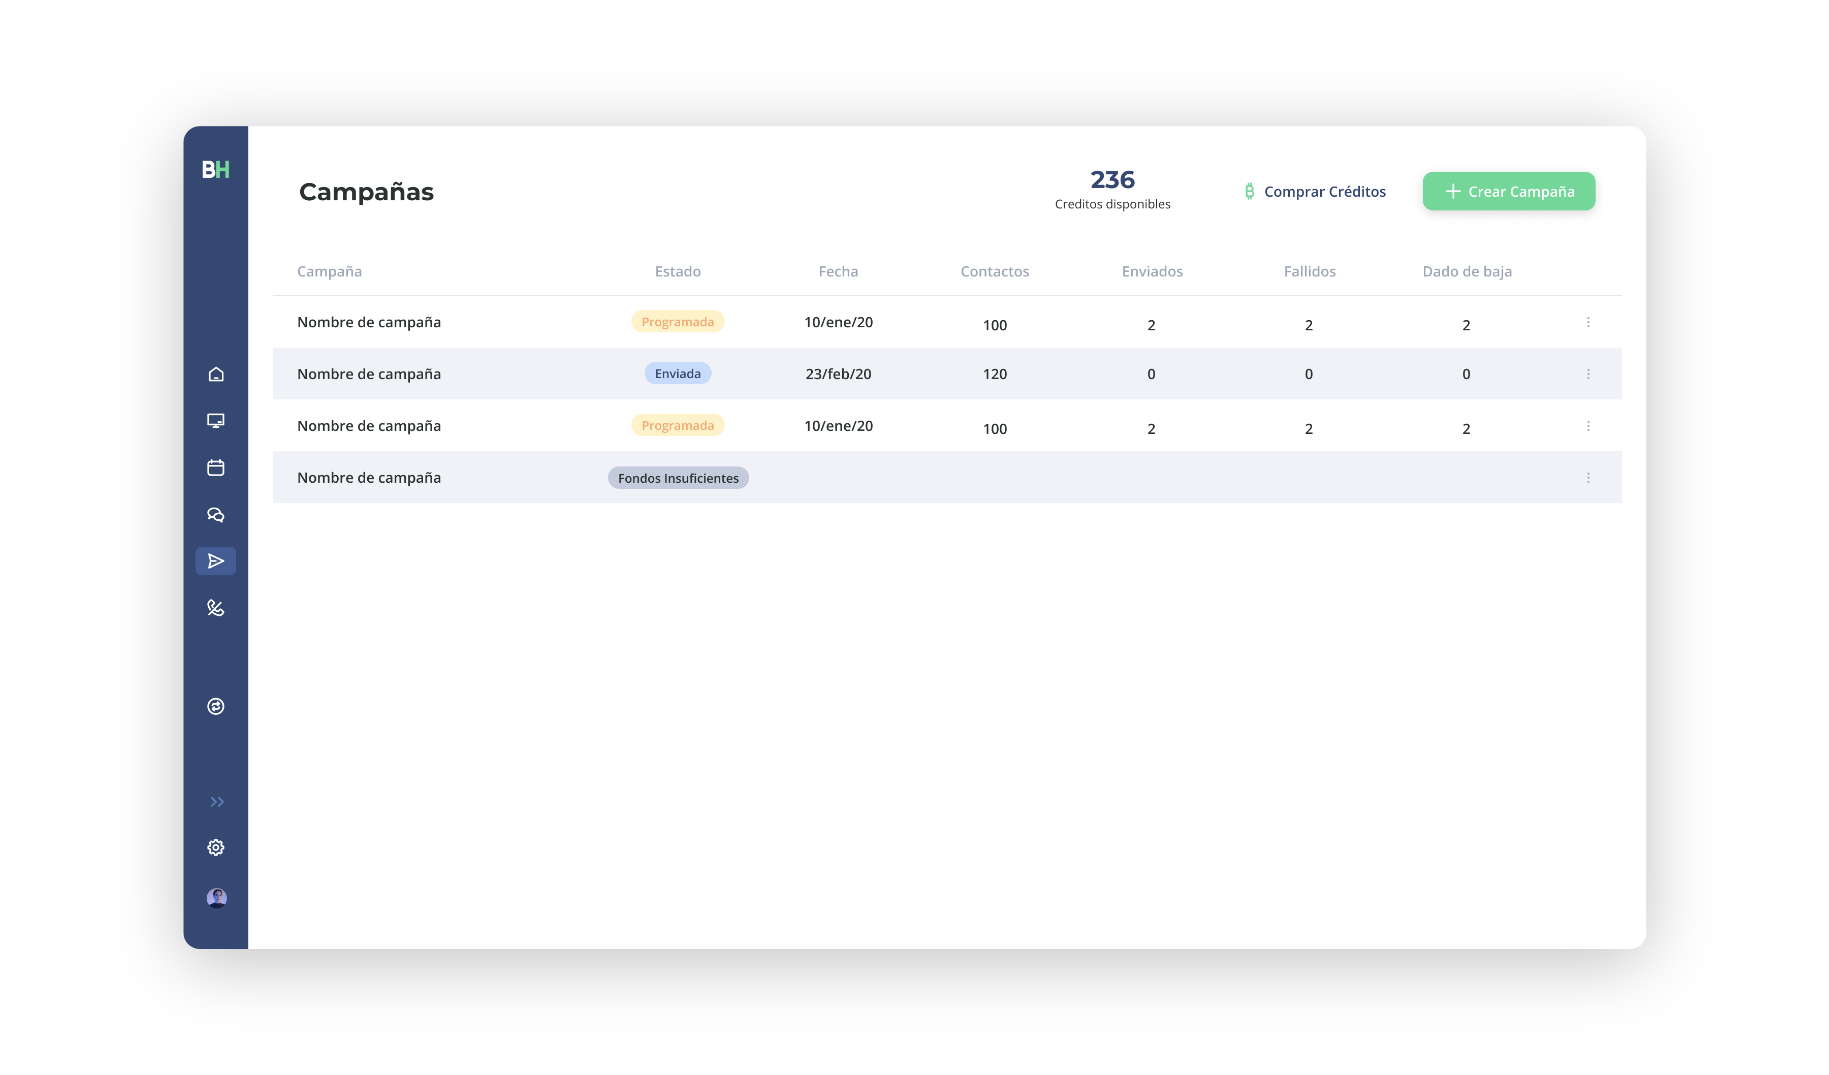
On the main screen you can create campaigns and view all campaigns that have been sent and their status.
Creating Campaigns
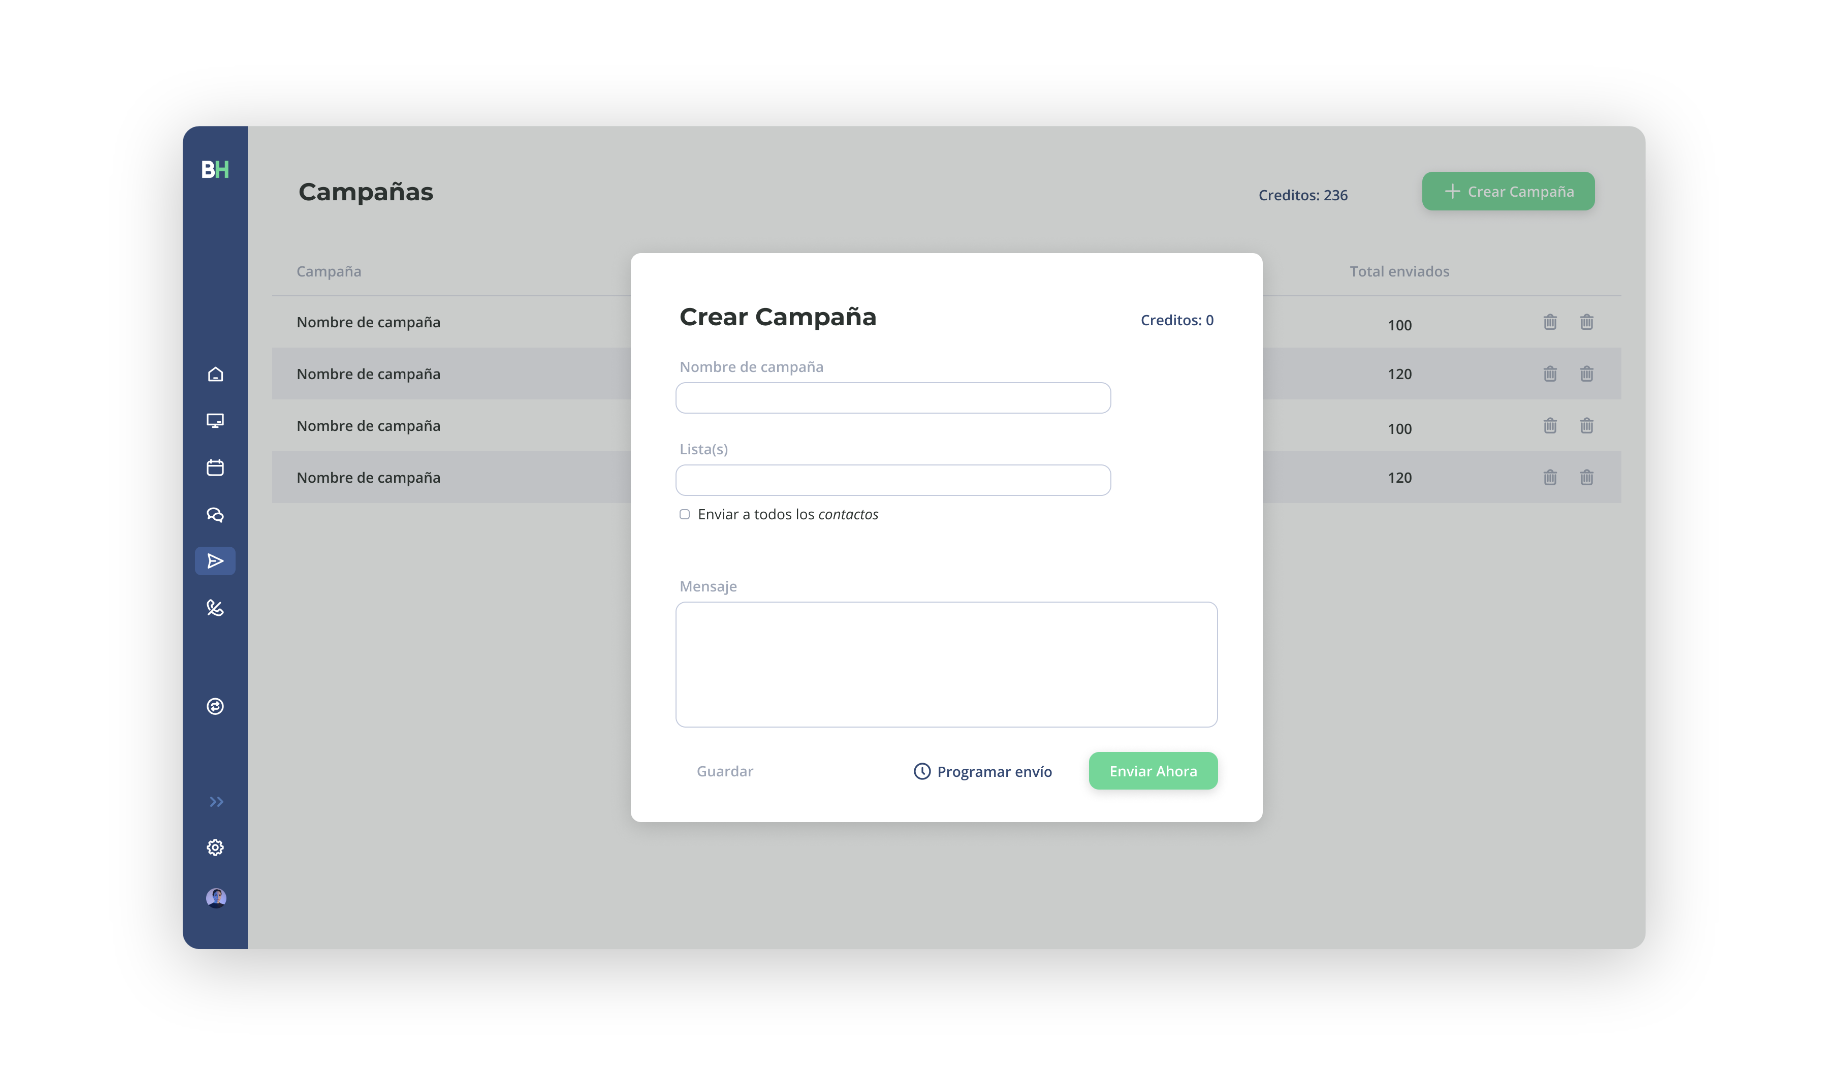
- Press the "Create Campaign" button.
- Name the campaign.
- Add the contacts.
- Write the message.
- Send or schedule the campaign.
- If you schedule the campaign, select the day and time you want the campaign to be sent.
Campaign Details
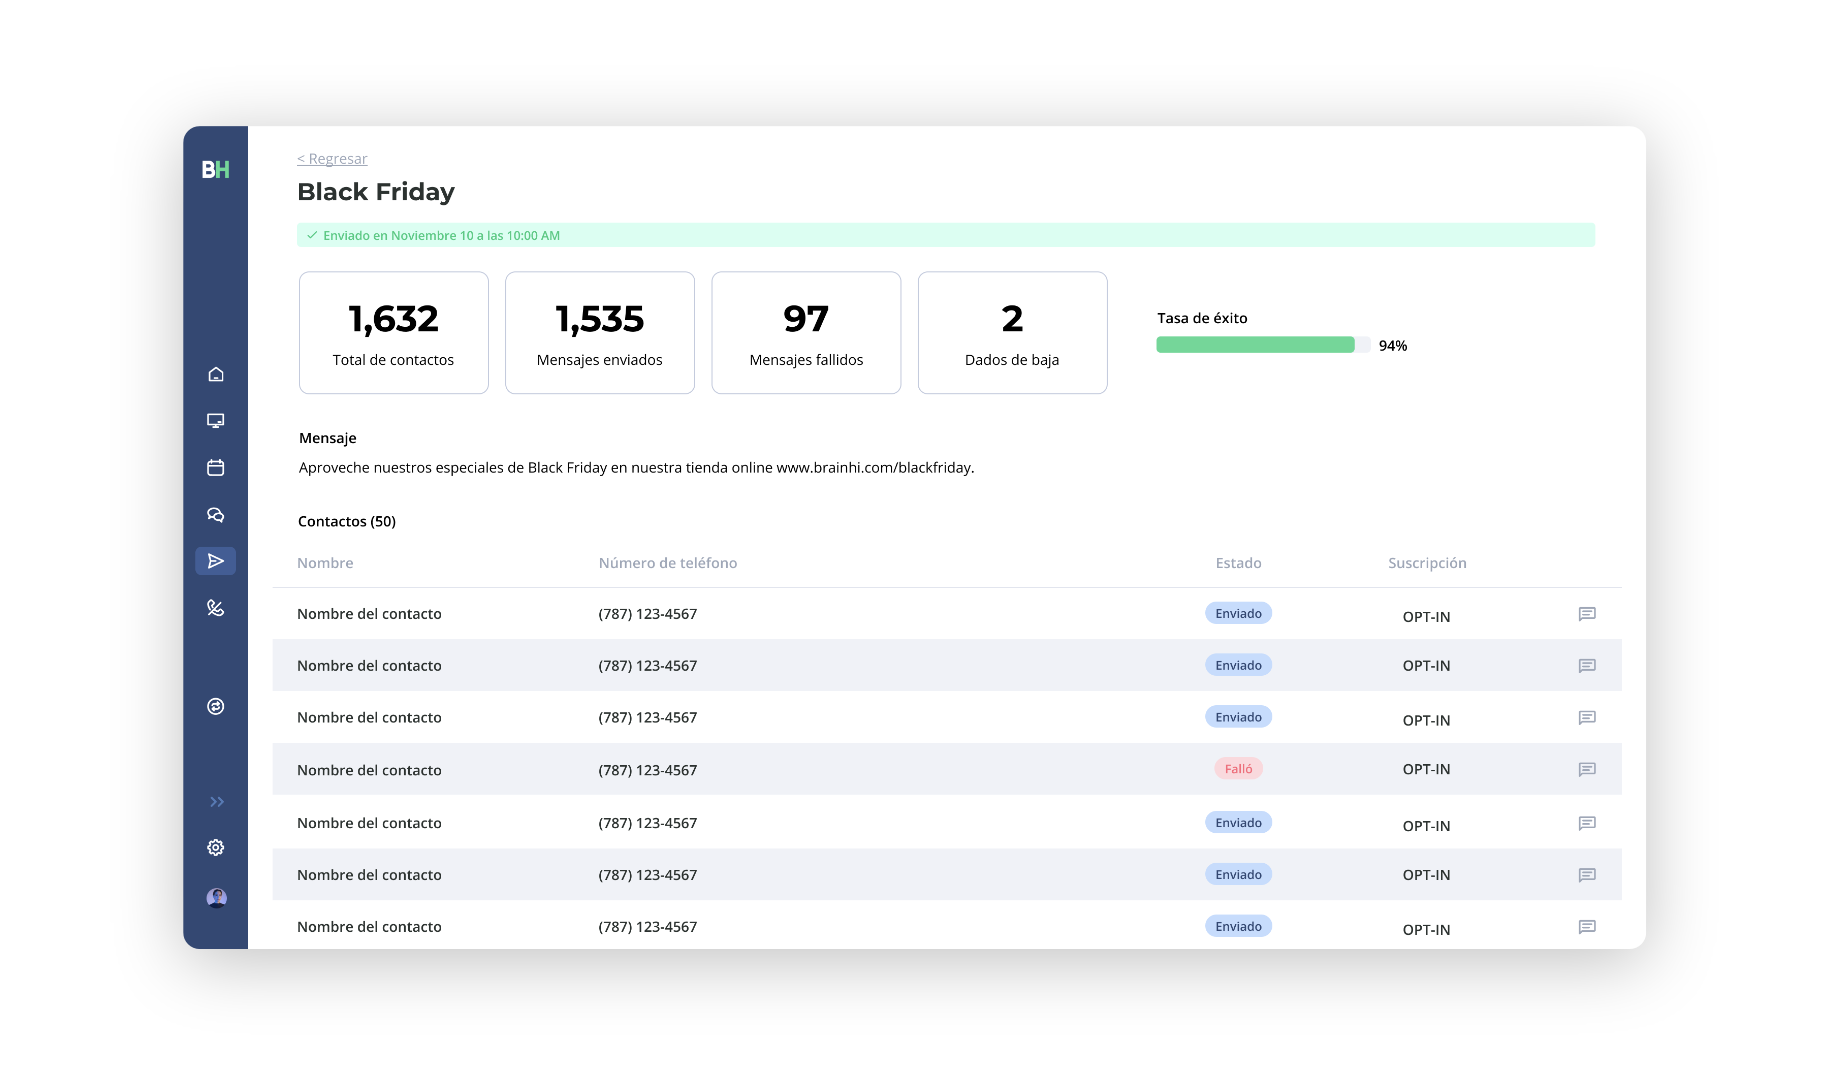
- Day and time the campaign was sent; if the campaign is scheduled, this date will be in the future.
- Total contacts: total contacts to whom the message delivery was attempted.
- Messages sent: messages that were successfully sent; that the contact received.
- Failed messages: messages that did not reach their destination (the contact).
- Unsubscribed: contacts who, after receiving the message, responded "STOP" to stop receiving messages.
- Send rate: Percentage of contacts who successfully received the message.
- Message: message that was sent to contacts in the campaign.
- Contacts: all contacts who received the message and the message status (pending, sending, sent, or failed).
Credits
Unlike bulk messages, each message in campaigns is equivalent to one credit. Credits can be purchased from the portal and have no expiration date.
Related Articles